 QingYo
引言
前段时间,部门内一个用于服务全公司统一登录的系统触发了几个容器重启问题。问题本身没有导致系统故障,因为我们系统做了几重高可用设计。但是,这几个容器的重启没有引发钉钉的通知,导致它自愈后我们才知道。这是一个告警单点的隐患,一旦钉钉渠道出现问题,我们很可能就错失重要的告警。因此,我计划对告警系统做些增强。
主要的改造点如下:
- 增加一套prometheus系统,作为主告警系统的备份。
- 从系统外,以token认证形式访问kubernetes的各个kubelet,采集各个主机上的容器性能指标;访问各个主机上部署的node-exporter,获取主机性能信息。
- 编写一个简单的指标审核python脚本,抽查主机和容器的性能指标,一旦发现异常,调用tts发送语音告警,同时触发钉钉群消息,再通过一个实体的告警状态灯显示告警状态。
本文主要涉及告警状态灯的设计。
硬件
硬件列表
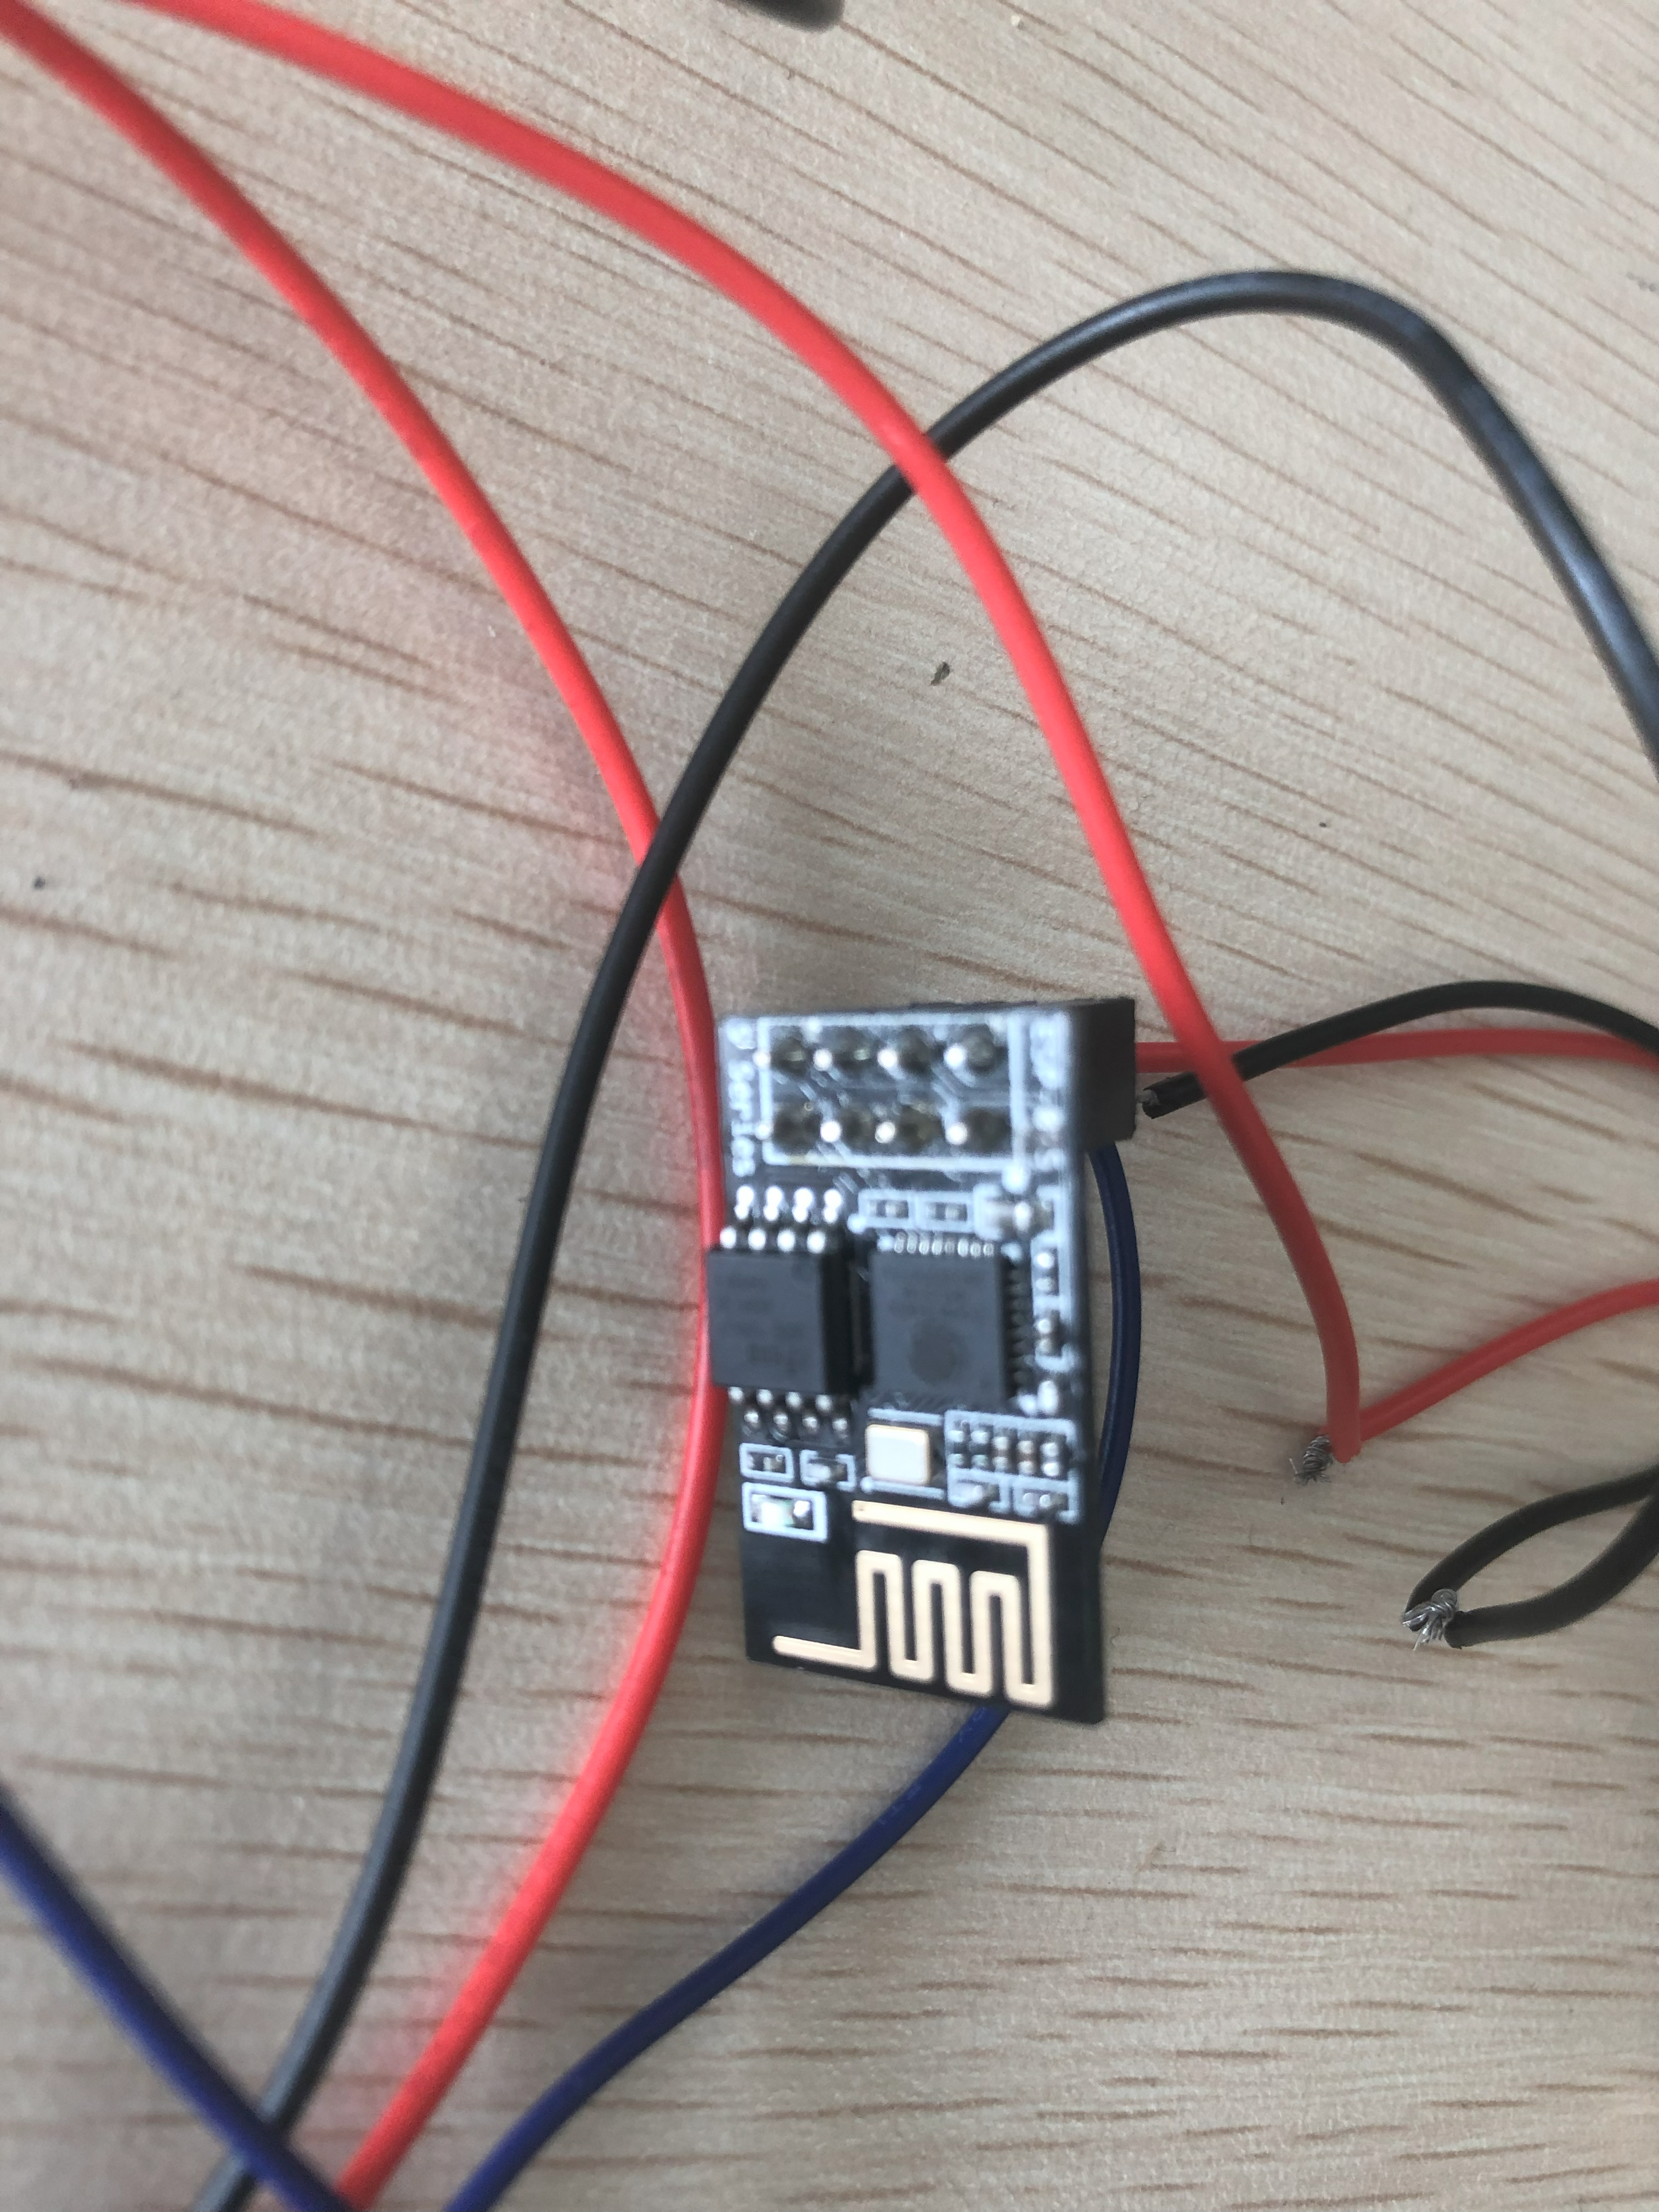
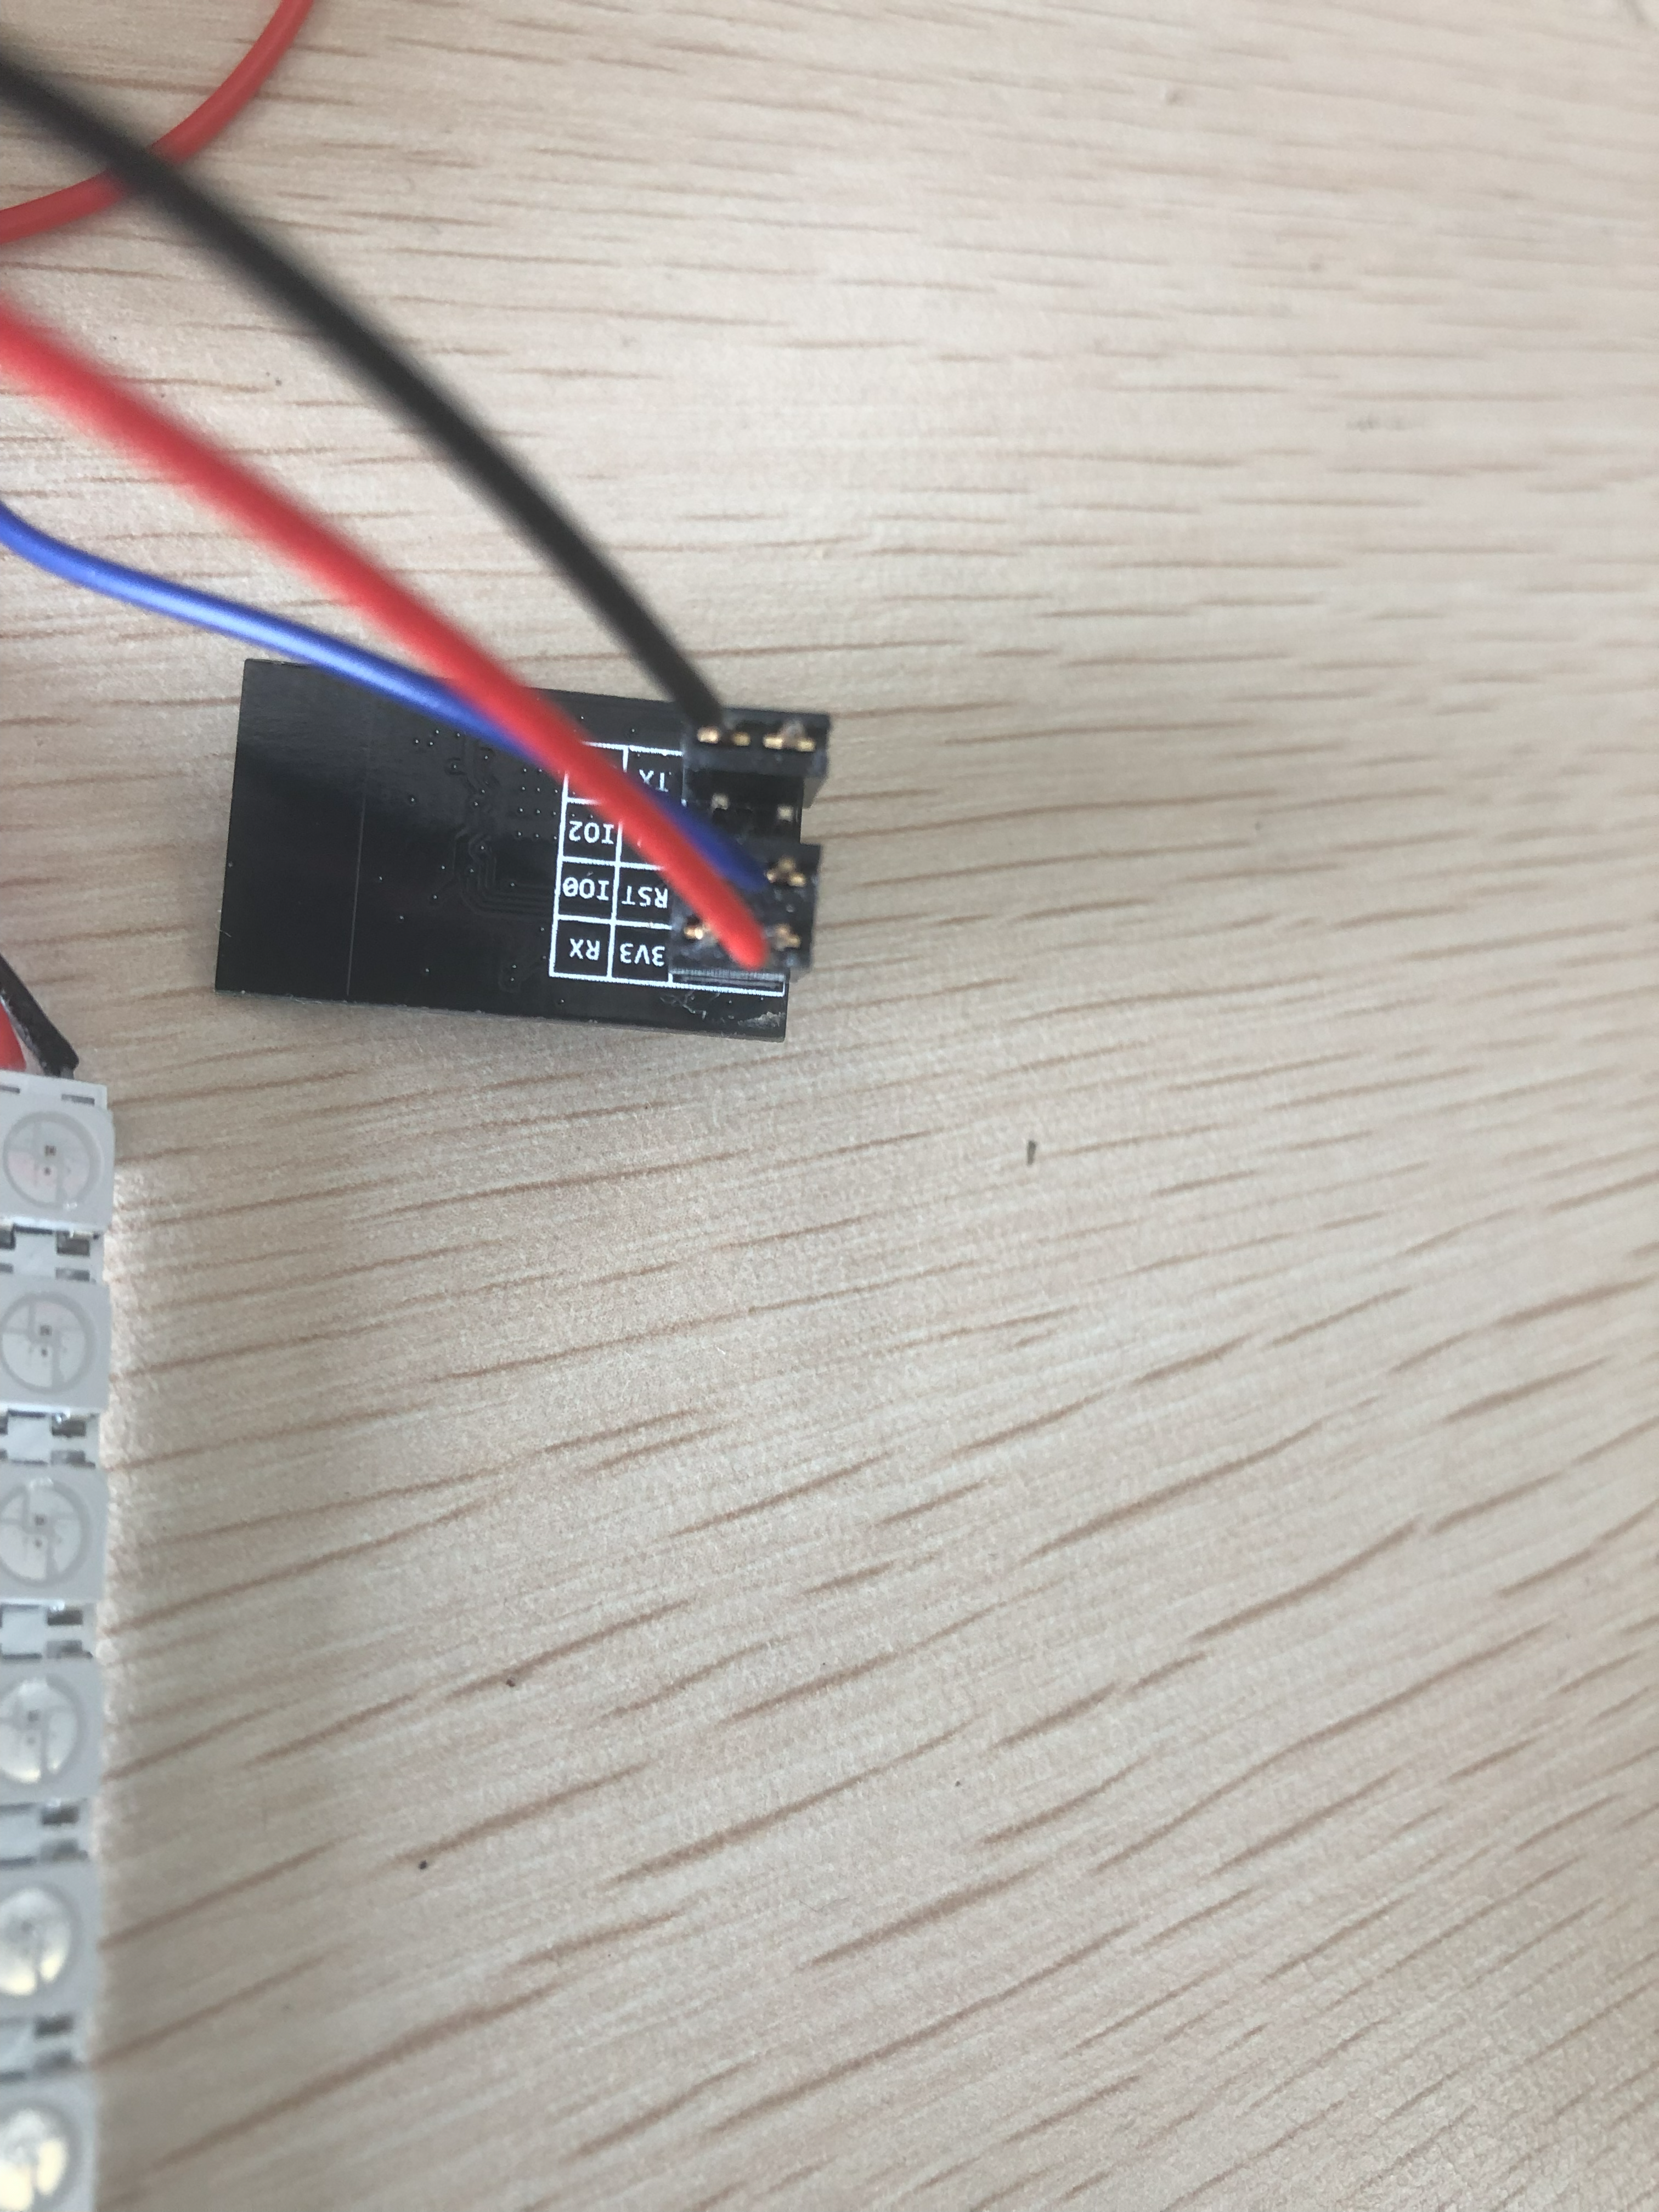
- ESP8266-01S
- WS2812 直线8位RGB灯条
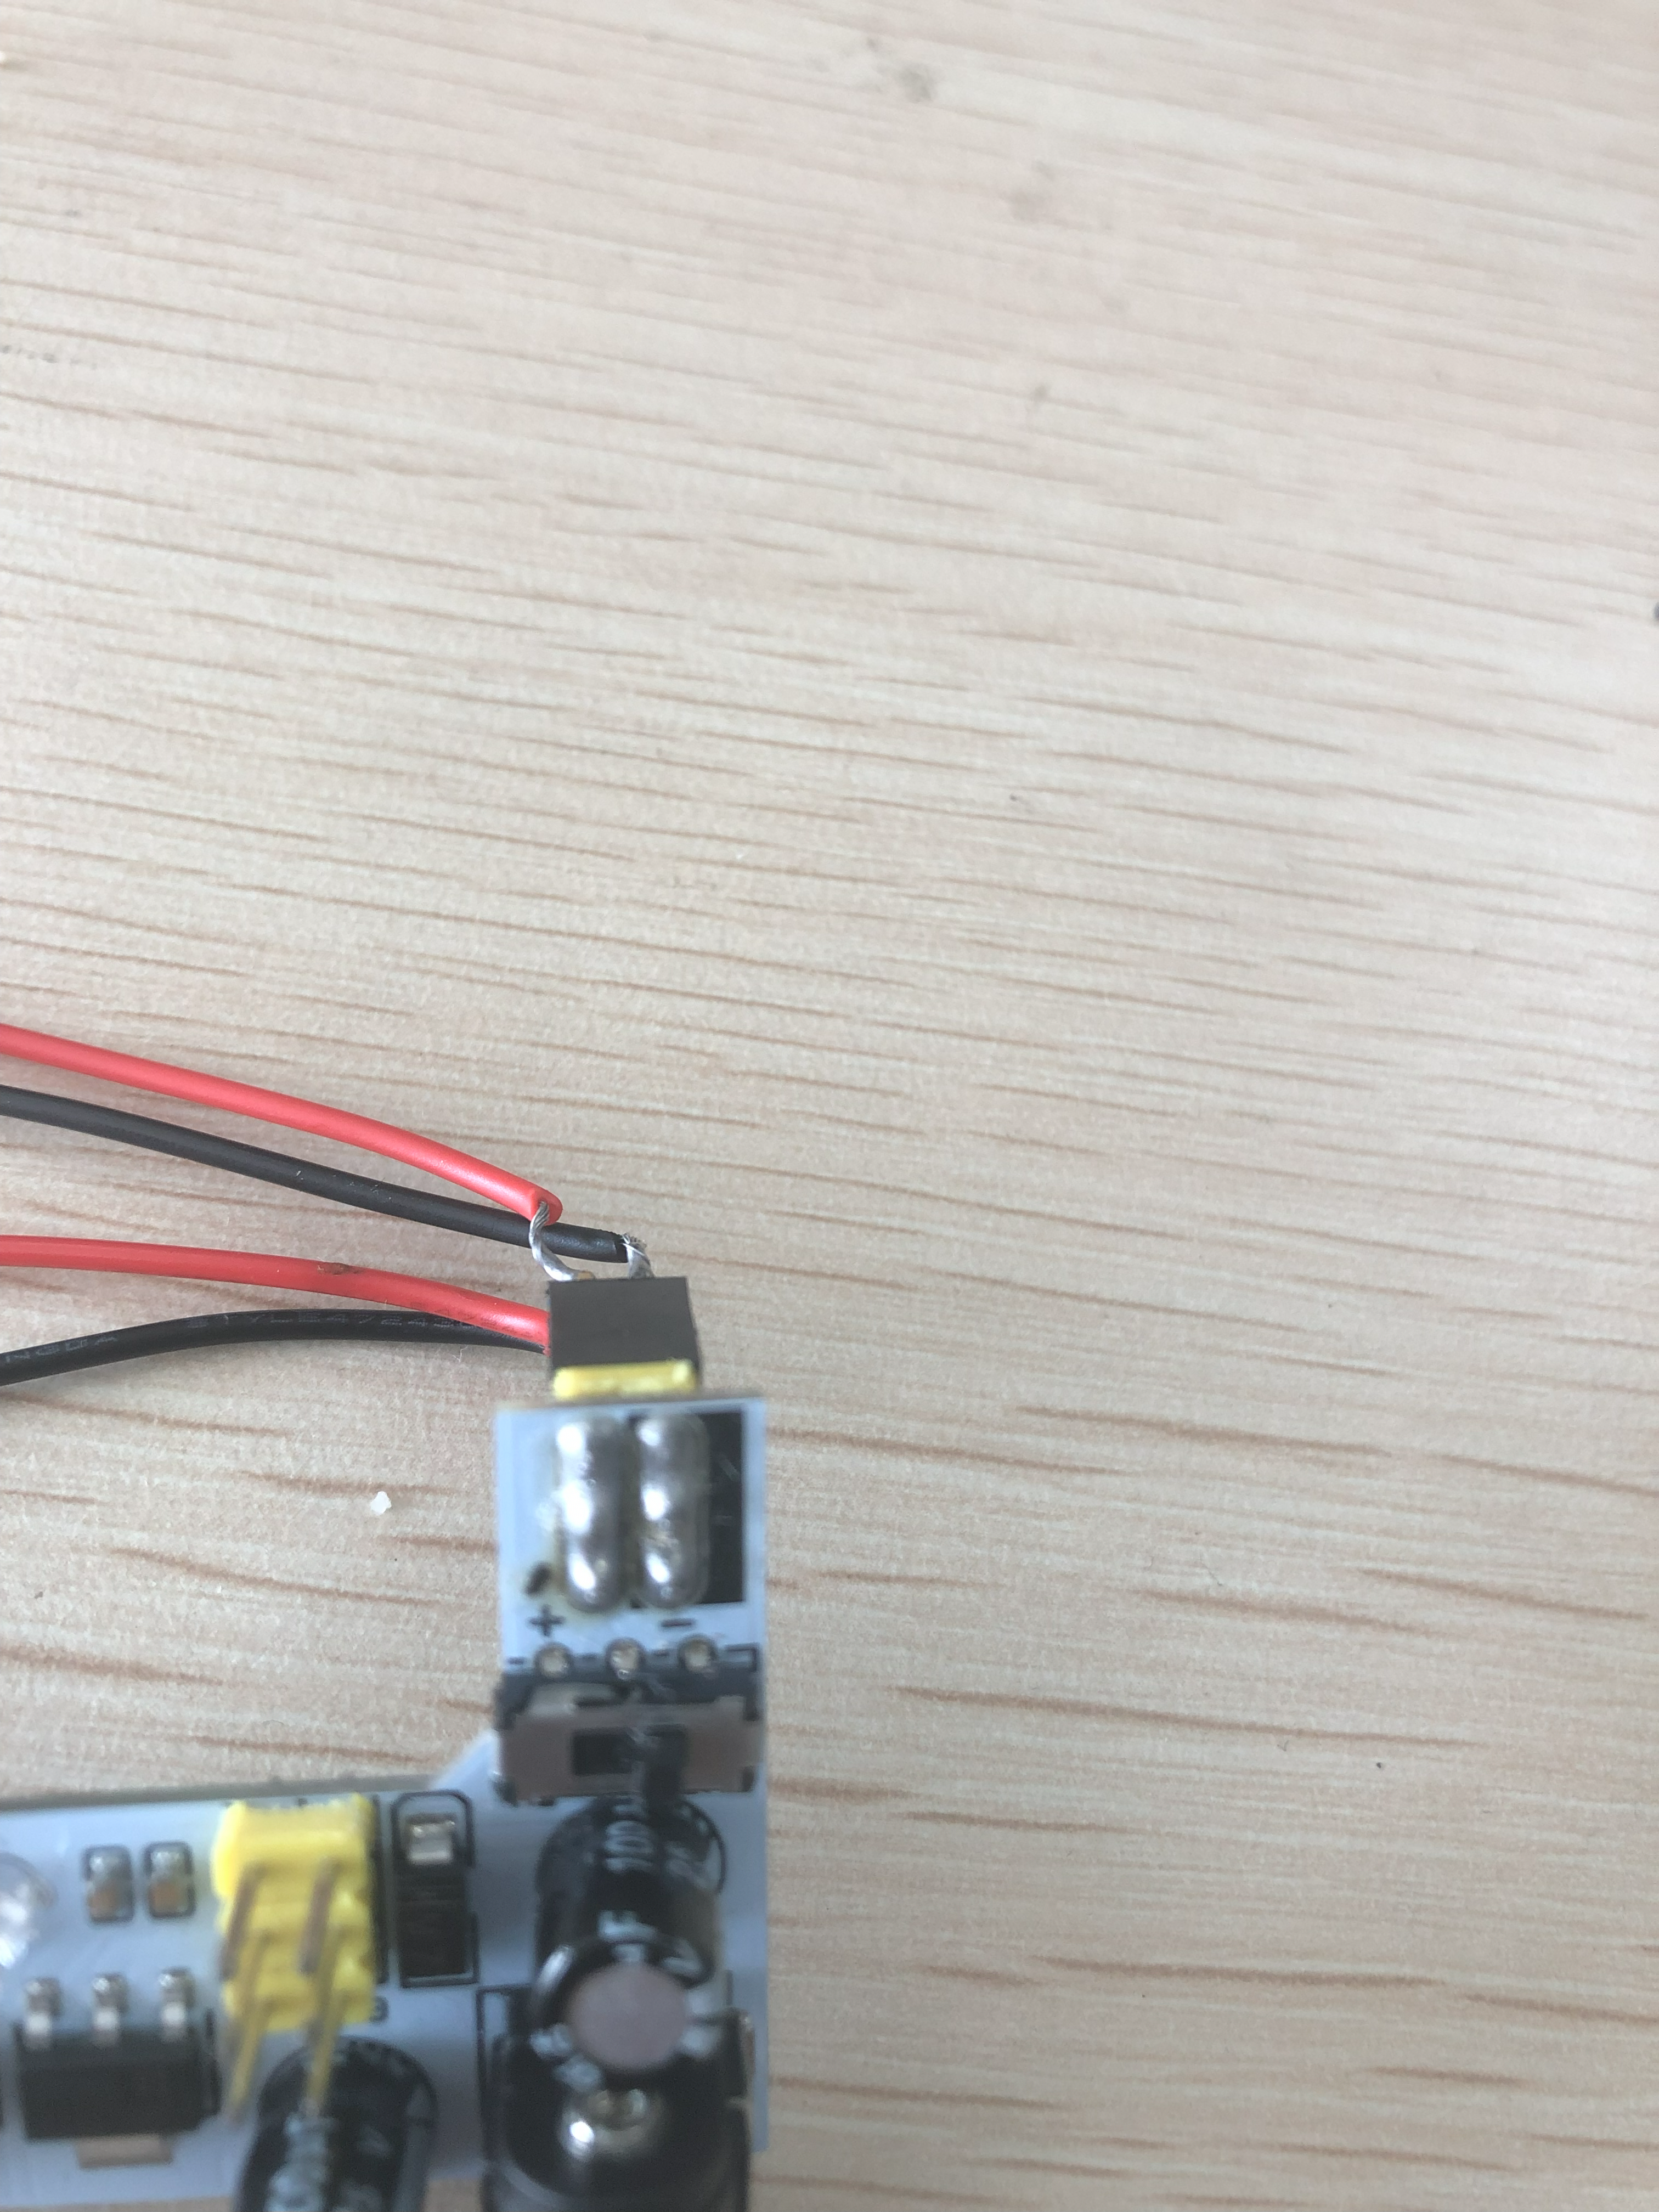
- 3.3v&5v 供电模块
- 5v充电头
- 导线及排母若干
采用ESP01S主要是因为我们这个告警灯小系统接口简单,ESP01S完全可以满足,ESP01S目前价位在4到5元左右,现在用的这个模块还是我几年前高价(8元?)囤积的。
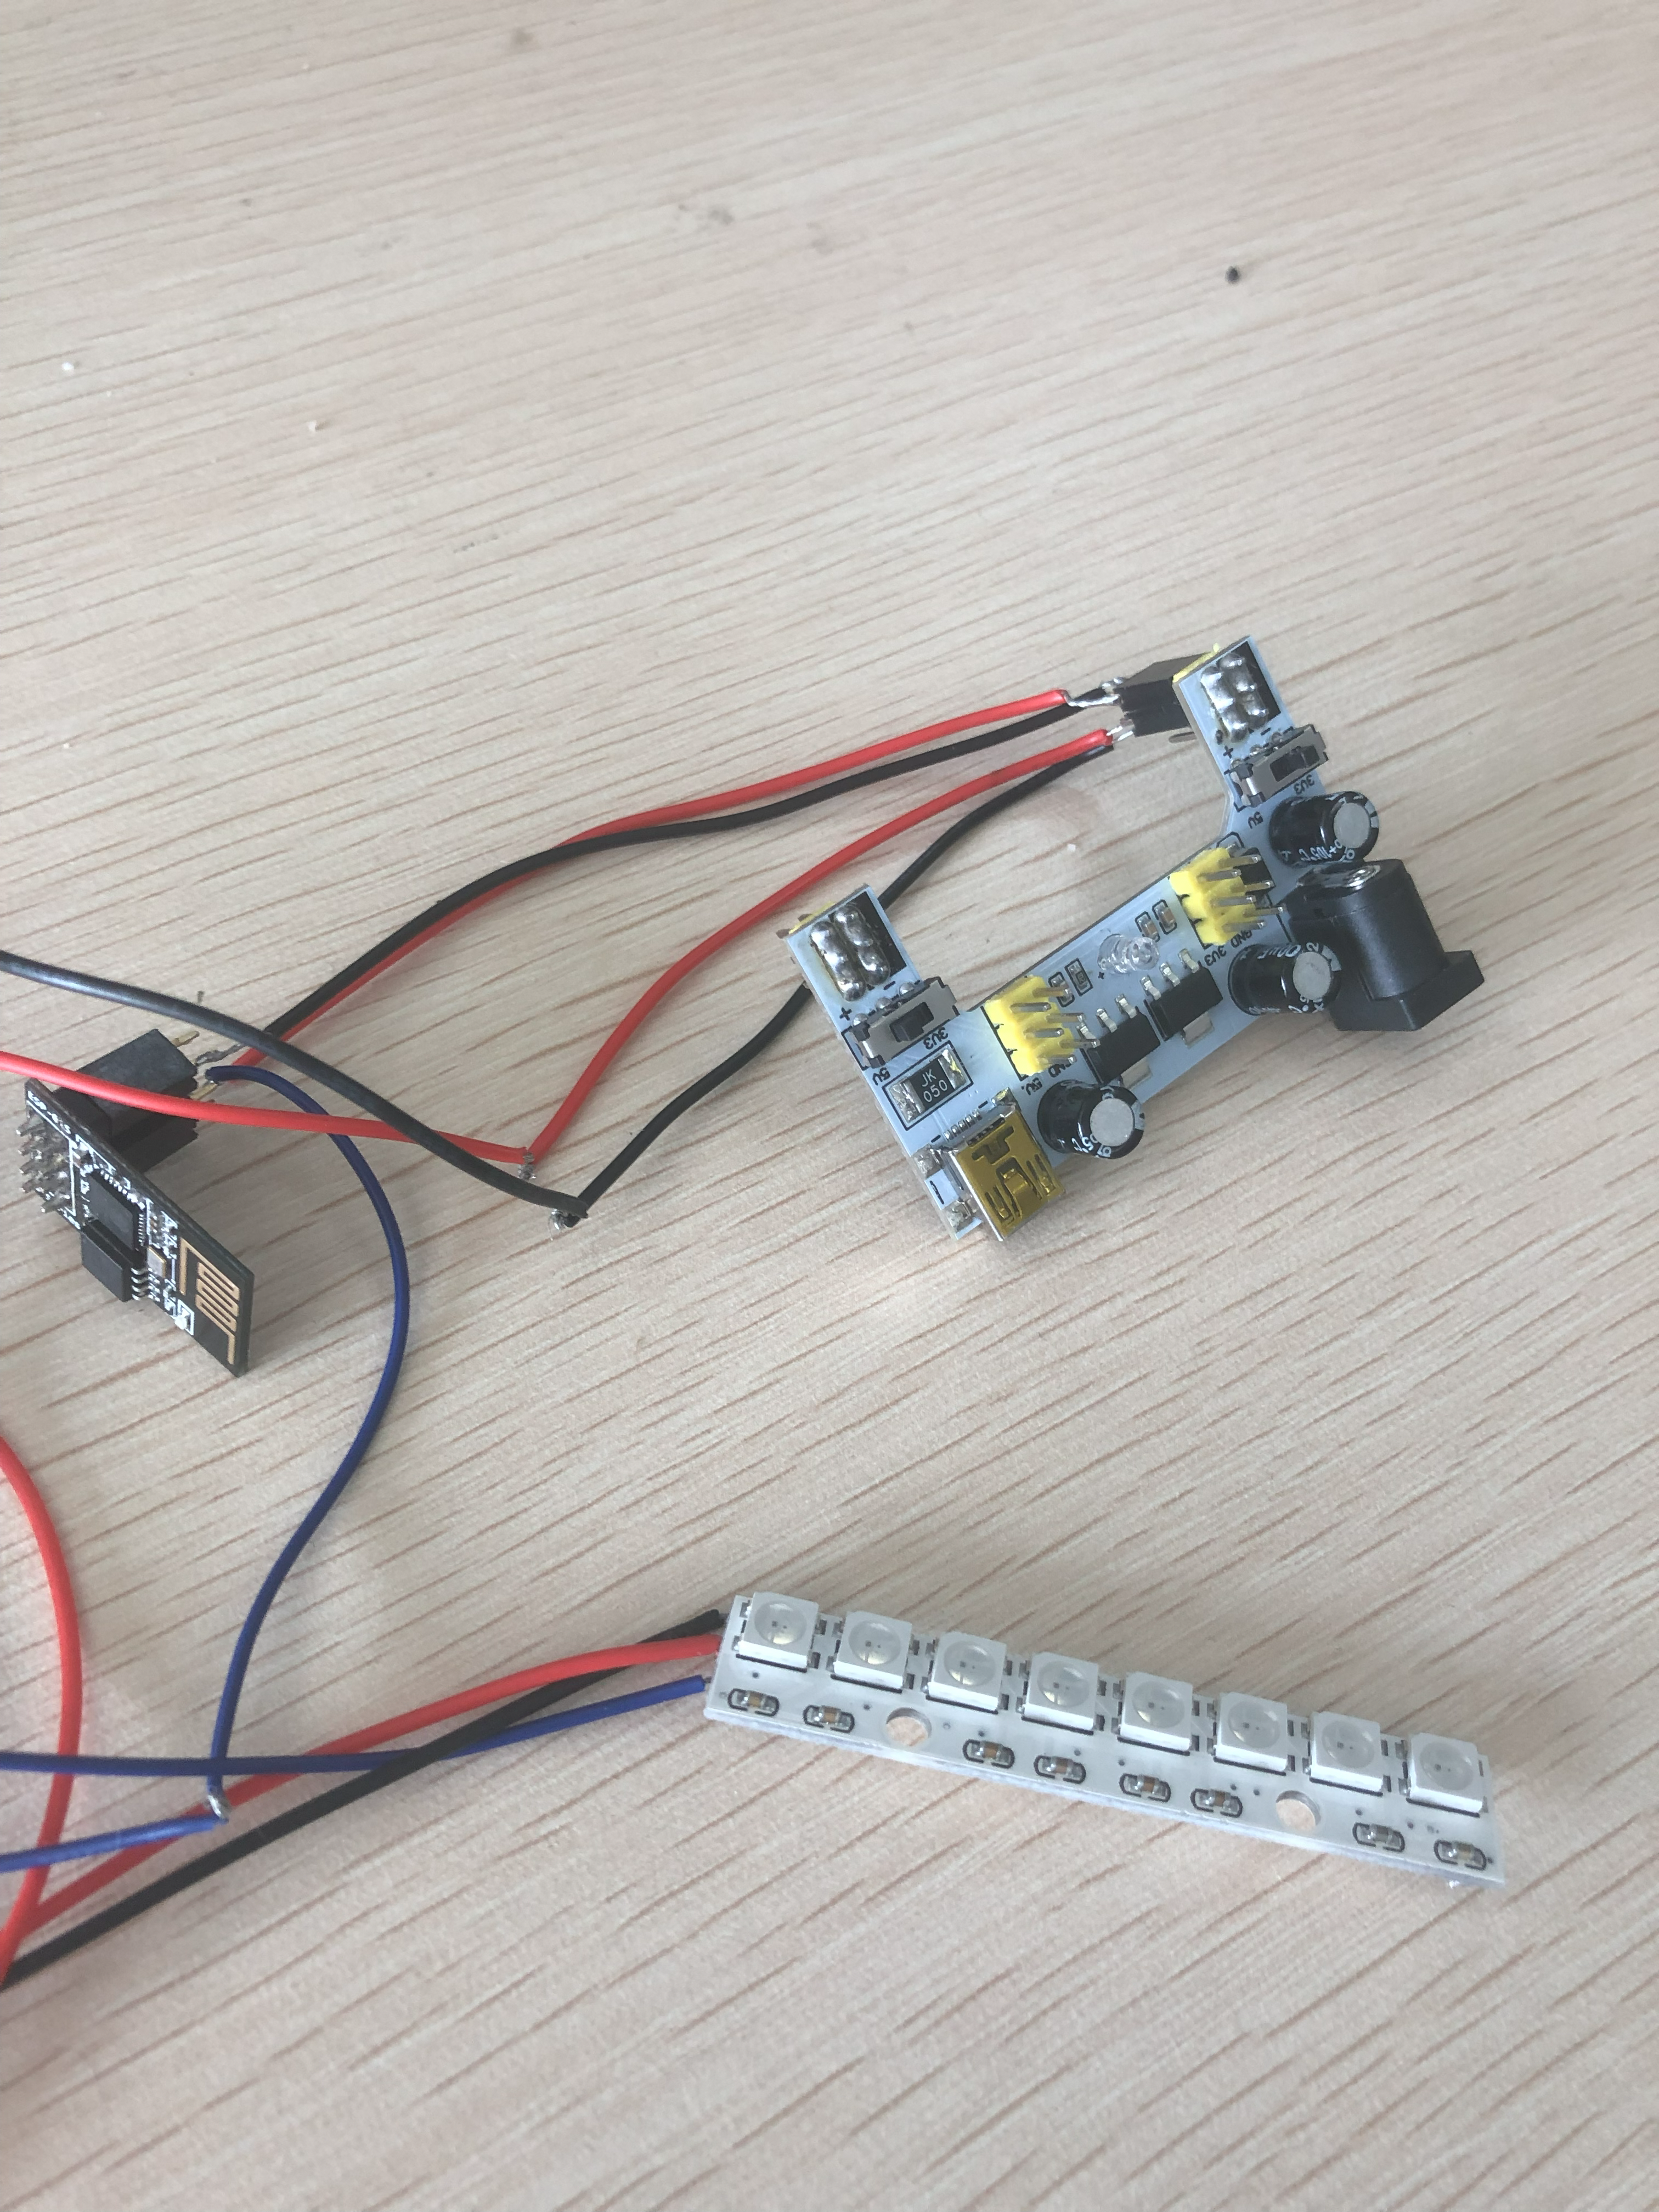
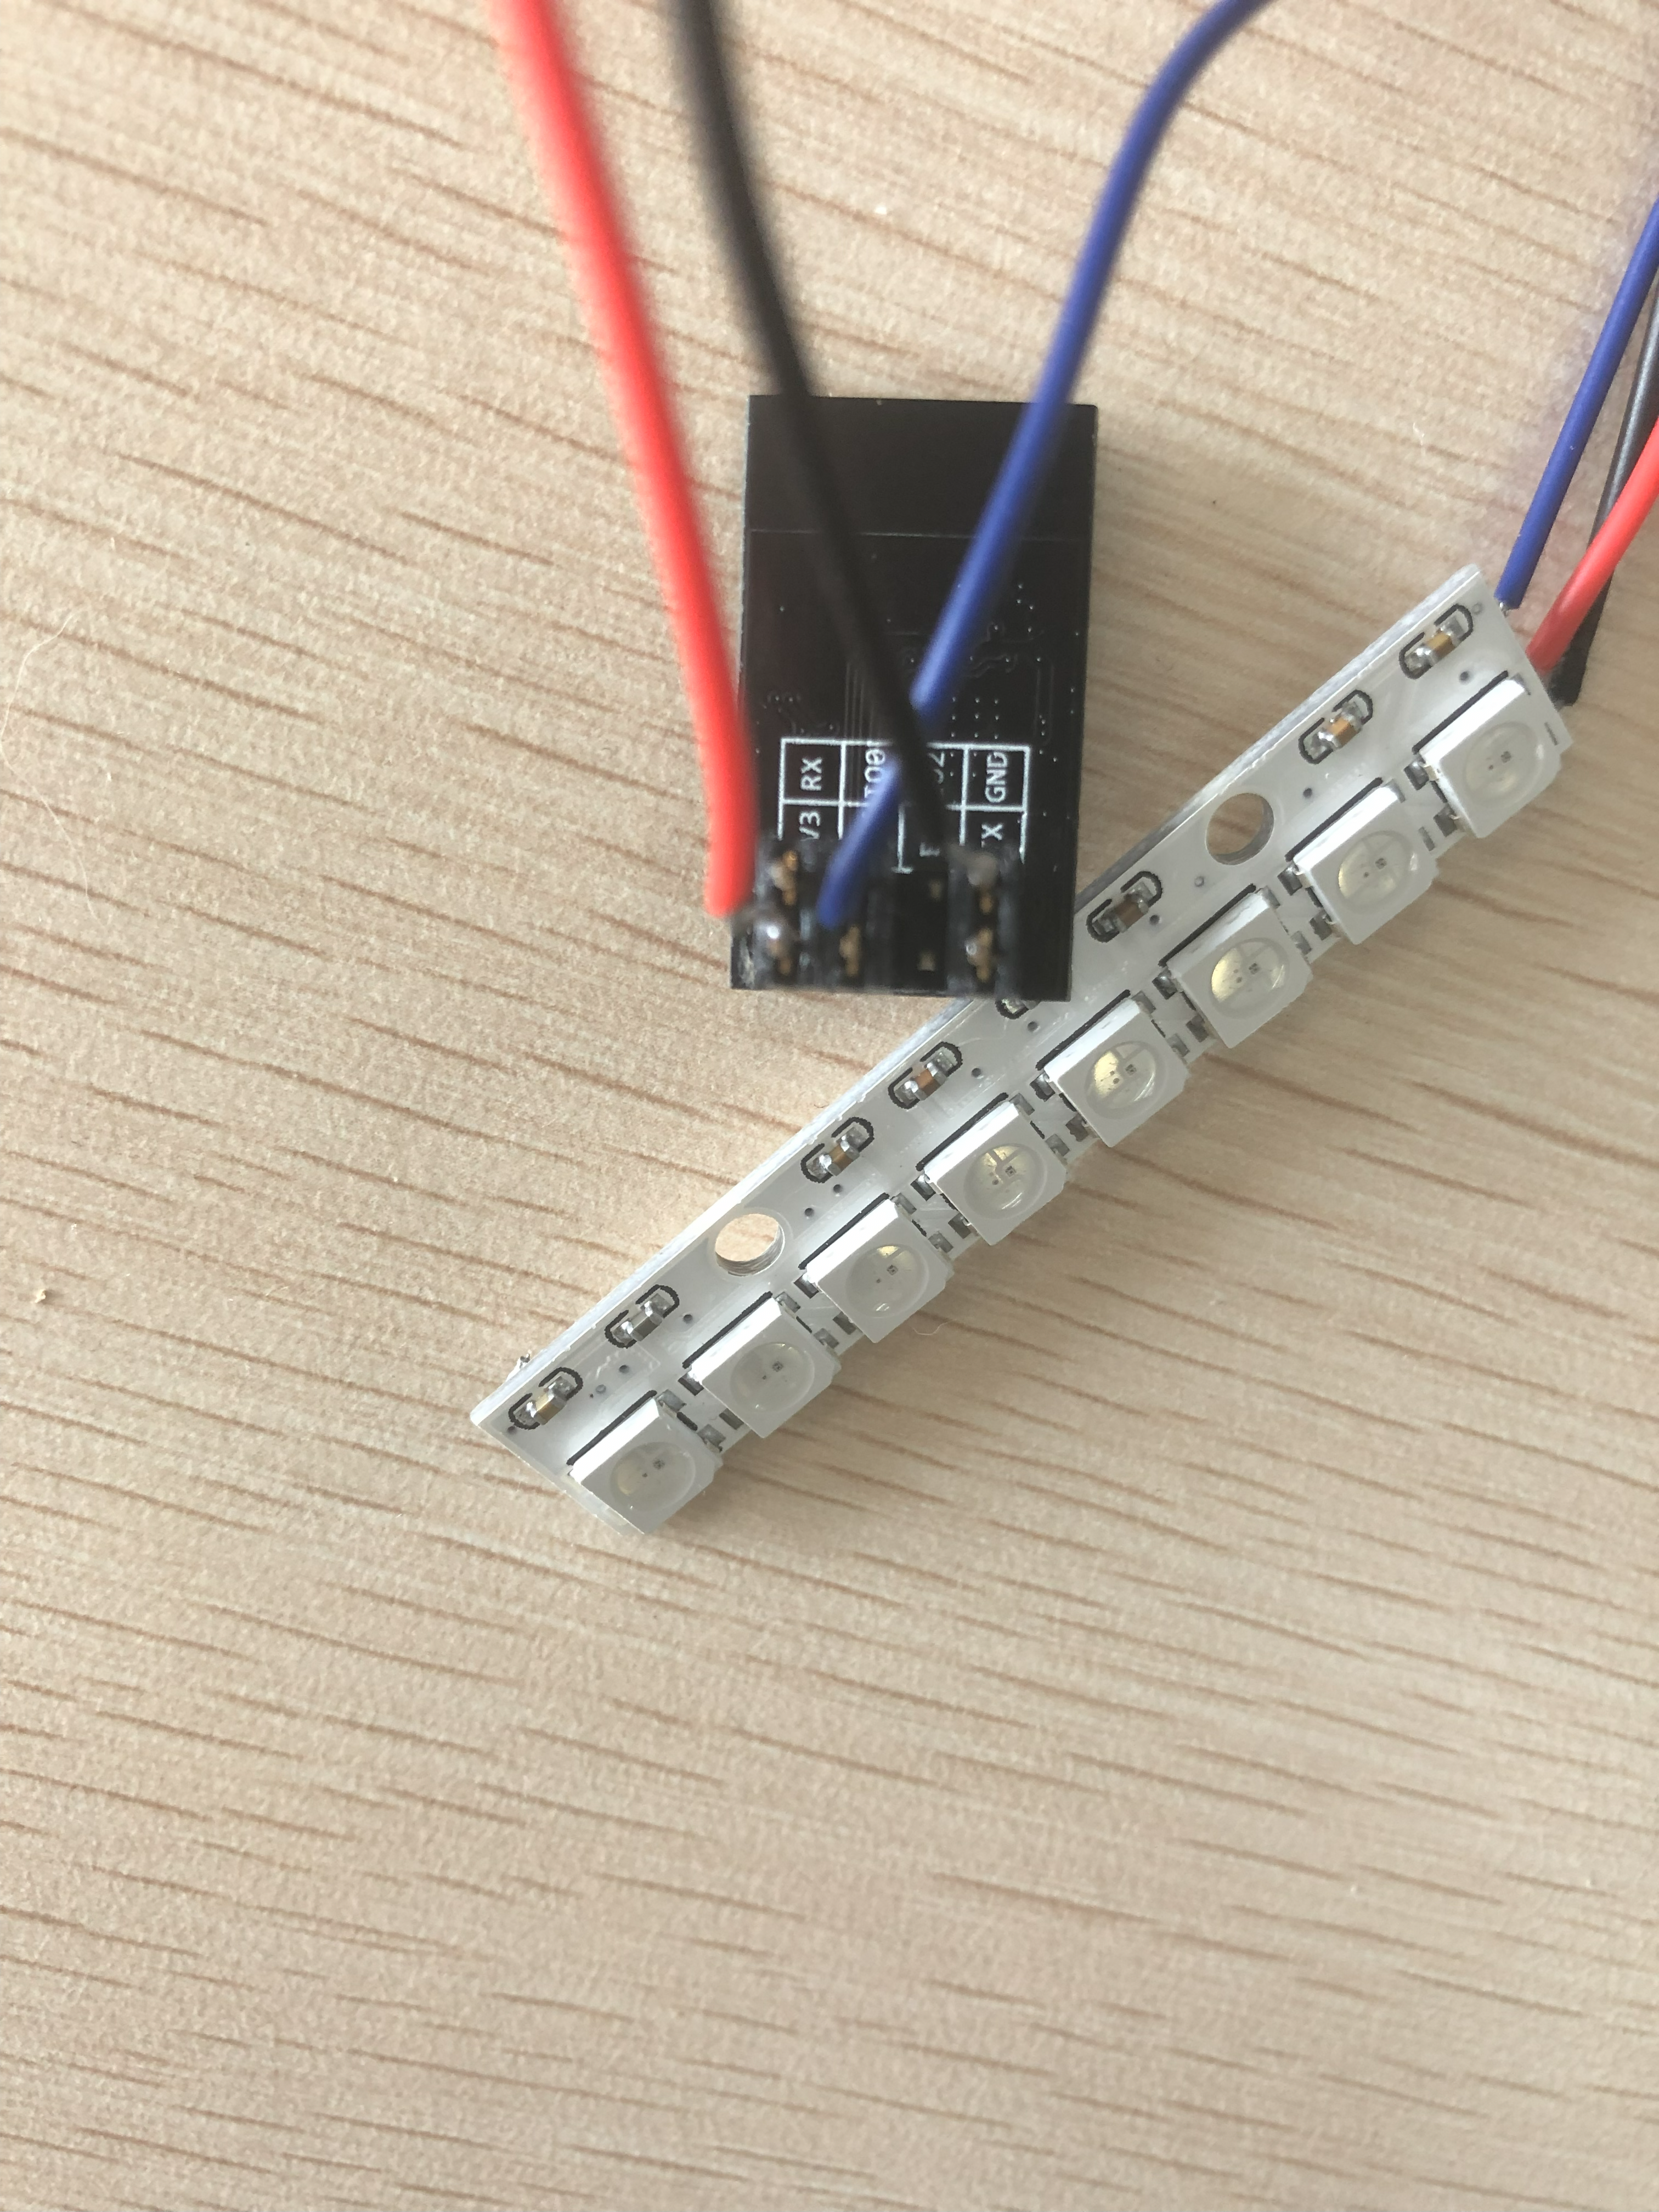
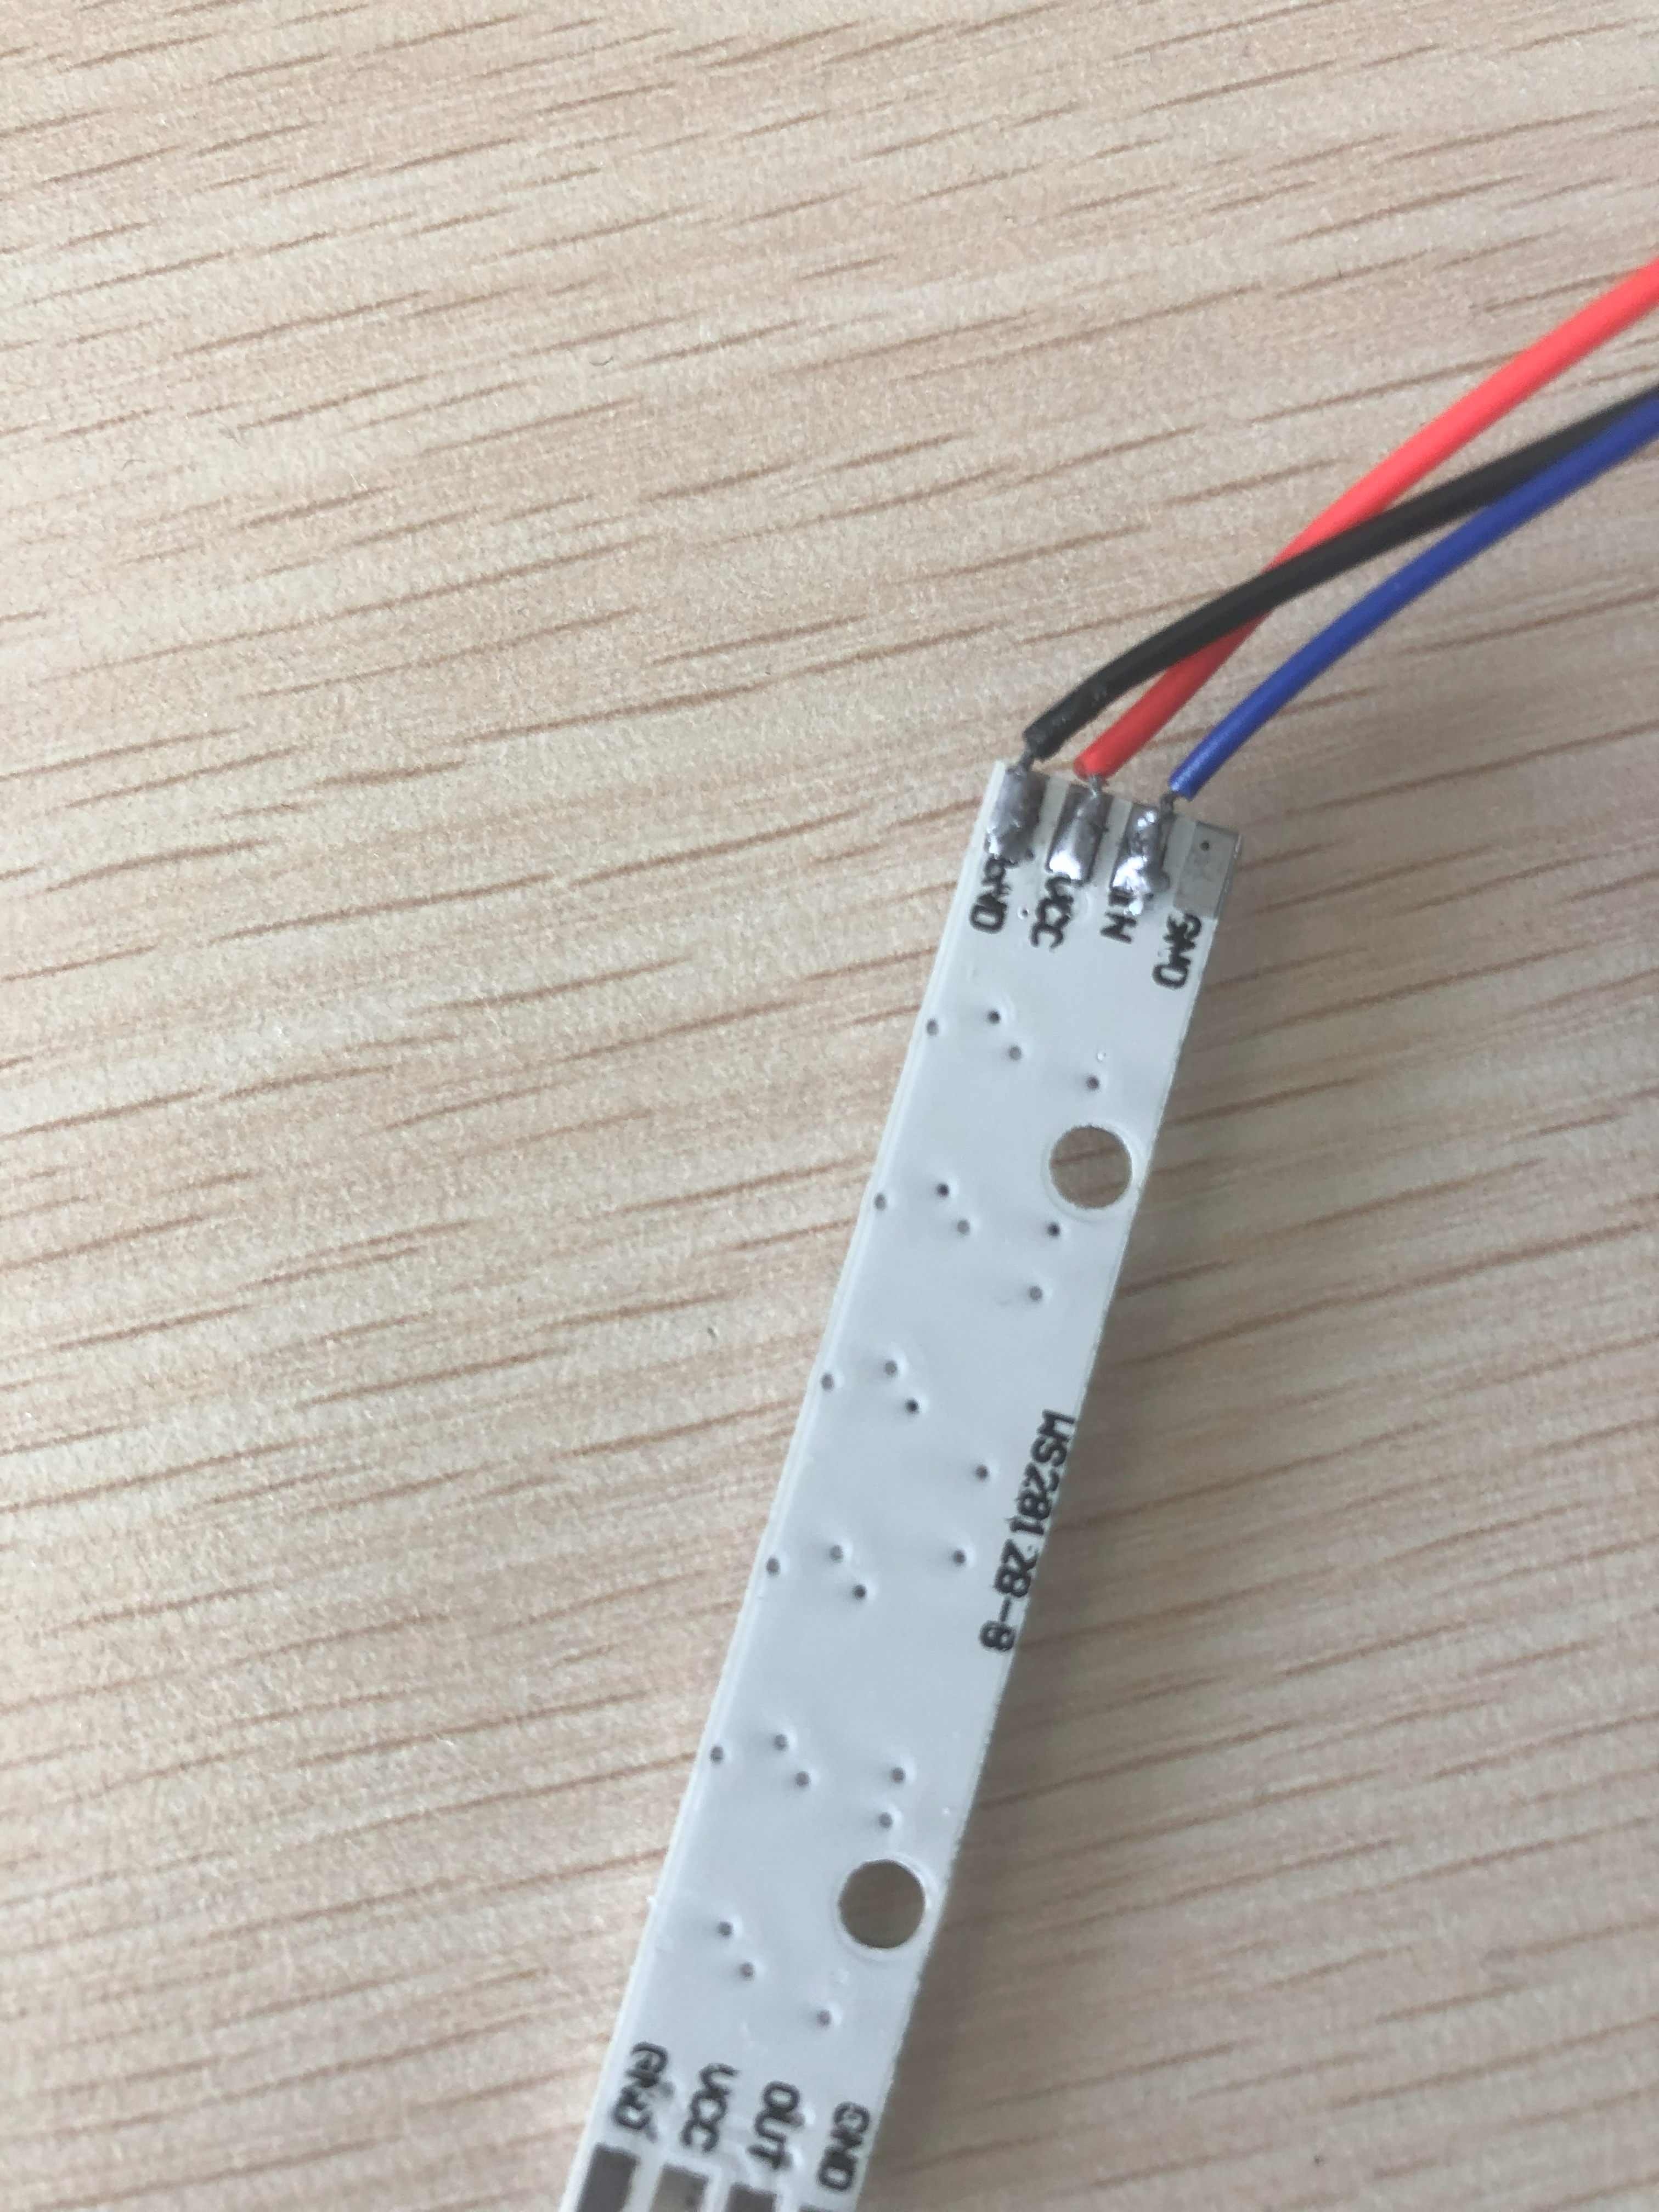
接线
接线也比较简单,文字描述下就行:
- ESP01S的电源和GND接供电模块的3.3V输出和GNG
- WS2812的电源和GND接供电模块的3.3V输出和GNG
- ESP01S的GPIO0 (在代码中定义)接WS2812的IN端
代码
初始化后,mDNS提供域名解析,ESP8266WebServer提供web服务,接收到set_alarm_status参数后,更新灯珠对应颜色。每一位表示一种类型的告警,绿是正常态,红是告警状态。如果一定时间没有收到更新消息,所有的灯珠就会自动灭了,这样可以判断出到底告警系统是否还在正常工作。
// A simple sketch to show the system alarm bar by 8 WS2812B LEDs.

#include <ESP8266WiFi.h>
#include <WiFiClient.h>
#include <ESP8266WebServer.h>
#include <ESP8266mDNS.h>

#include <Adafruit_NeoPixel.h>
#ifdef __AVR__
 #include <avr/power.h> // Required for 16 MHz Adafruit Trinket
#endif

// Which pin on the Arduino is connected to the NeoPixels?
// On a Trinket or Gemma we suggest changing this to 1:
#define LED_PIN    0

// How many NeoPixels are attached to the Arduino?
#define LED_COUNT 8

// Declare our NeoPixel strip object:
Adafruit_NeoPixel strip(LED_COUNT, LED_PIN, NEO_GRB + NEO_KHZ800);
// Argument 1 = Number of pixels in NeoPixel strip
// Argument 2 = Arduino pin number (most are valid)
// Argument 3 = Pixel type flags, add together as needed:
//   NEO_KHZ800  800 KHz bitstream (most NeoPixel products w/WS2812 LEDs)
//   NEO_KHZ400  400 KHz (classic 'v1' (not v2) FLORA pixels, WS2811 drivers)
//   NEO_GRB     Pixels are wired for GRB bitstream (most NeoPixel products)
//   NEO_RGB     Pixels are wired for RGB bitstream (v1 FLORA pixels, not v2)
//   NEO_RGBW    Pixels are wired for RGBW bitstream (NeoPixel RGBW products)


String ssid = "";
String password = "";
int run_time = 0;
ESP8266WebServer server(80);


void server_handles() {

    //set the all the led with color specified in the post body, using colorWipe function
    server.on("/set", []() {
      String response = server.arg("plain");
      int volume = atoi(response.c_str());
      switch(volume){

      case 1:
      Serial.println("Red");
      colorWipe(strip.Color(255,   0,   0), 50);
      break ;
      case 2:
      Serial.println("Green");
      colorWipe(strip.Color(0,   255,   0), 10);
      break ;
      case 3:
      Serial.println("blue");
      colorWipe(strip.Color(0,   0,   255), 10);
      break ;
      }
    });

    //set the led in position of index with color specified in the the arguments of color_1, color_2, color_3
    server.on("/set_bit_color", []() {
      String index_string = server.arg("index");
      int index = atoi(index_string.c_str());
      String color_1_string = server.arg("color_1");
      int color_1 = atoi(color_1_string.c_str());
      String color_2_string = server.arg("color_2");
      int color_2 = atoi(color_2_string.c_str());
      String color_3_string = server.arg("color_3");
      int color_3 = atoi(color_3_string.c_str());
      set_bit_color(strip.Color(color_1,   color_2,   color_3), index);
    });

    //set the alarm status with colors of red and green
    server.on("/set_alarm_status", []() {
      run_time = 0;
      String status_string = server.arg("status");
      int status = atoi(status_string.c_str());
      for (int i = 0; i < 8; i++) {
        // 检查第i位是否为1
        if (status & (1 << i)) {
         set_bit_color(strip.Color(255,   0,   0), i); // 设置为红色 (HIGH)
          } else {
          set_bit_color(strip.Color(0,   255,   0), i); // 设置为绿色 (LOW)
            }
      }
      server.send(200, "text/plain", "successfully update alarm status!\r\n");
    });

}

// setup() function -- runs once at startup --------------------------------

void setup() {
  Serial.begin(115200);
  while (!Serial)  // Wait for the serial connection to be establised.
    delay(50);
  Serial.println();

    // Connect to Wi-Fi network with SSID and password
  Serial.print("Connecting to ");
  Serial.println(ssid);
  WiFi.begin(ssid,password);
  while (WiFi.status() != WL_CONNECTED)
  {
    delay(500);
    Serial.print(".");
  }
  // Print local IP address and start web server
  Serial.println("");
  Serial.println("WiFi connected.");

  IPAddress myIP = WiFi.localIP();
  Serial.println("IP address: ");
  Serial.println(myIP);

  if (!MDNS.begin("esp8266")) {             // Start the mDNS responder for esp8266.local
    Serial.println("Error setting up MDNS responder!");
  }
  Serial.println("mDNS responder started");

  server_handles();
  server.begin();
  Serial.println("HTTP server started");
  MDNS.addService("http", "tcp", 80);

  // These lines are specifically to support the Adafruit Trinket 5V 16 MHz.
  // Any other board, you can remove this part (but no harm leaving it):
#if defined(__AVR_ATtiny85__) && (F_CPU == 16000000)
  clock_prescale_set(clock_div_1);
#endif
  // END of Trinket-specific code.

  strip.begin();           // INITIALIZE NeoPixel strip object (REQUIRED)
  strip.show();            // Turn OFF all pixels ASAP
  strip.setBrightness(10); // Set BRIGHTNESS to about 1/5 (max = 255)
  colorWipe(strip.Color( 0,   0,   0), 50);
}


// loop() function -- runs repeatedly as long as board is on ---------------

void loop() {
  MDNS.update();
  server.handleClient();
  delay(50);
  run_time += 1;
  if (run_time >6000 ) {
    run_time = 0;
    colorWipe(strip.Color( 0,   0,   0), 50);
  }
}


// Some functions of our own for creating animated effects -----------------

// Fill strip pixels one after another with a color. Strip is NOT cleared
// first; anything there will be covered pixel by pixel. Pass in color
// (as a single 'packed' 32-bit value, which you can get by calling
// strip.Color(red, green, blue) as shown in the loop() function above),
// and a delay time (in milliseconds) between pixels.
void colorWipe(uint32_t color, int wait) {
  for(int i=0; i<strip.numPixels(); i++) { // For each pixel in strip...
    strip.setPixelColor(i, color);         //  Set pixel's color (in RAM)
    strip.show();                          //  Update strip to match
    delay(wait);                           //  Pause for a moment
  }
}

void set_bit_color(uint32_t color, int index) {
    strip.setPixelColor(index, color);         //  Set pixel's color (in RAM)
    strip.show();                          //  Update strip to match
}
服务端
这里只贴下和更新状态相关的示例
def update_status(pos, bit_status):
    """
    更新 num 的第 pos 个比特为 status。

    :param num: 待更新的数字(0-255)
    :param pos: 要更新的比特位置,从1开始计数
    :param status: 要设置的状态,0 或 1
    :return: 更新后的数字
    """
    global led_status
    if pos < 1 or pos > 8:
        raise ValueError("Position must be within 1 to 8")

    if bit_status not in [0, 1]:
        raise ValueError("Status must be 0 or 1")

    mask = 1 << (pos - 1)

    if bit_status == 1:
        led_status |= mask  # 设置指定位置的比特为 1
    else:
        led_status &= ~mask  # 设置指定位置的比特为 0
    requests.get('http://10.42.0.46/set_alarm_status?status={}'.format(led_status))
演进思路
目前的tts是调用linux系统默认的speaker输出声音,这里有个弊端,就是当别的软件占用这个speaker的时候,tts就会被堵住。
tts的实现代码如下,注意,里面AudioOutputConfig里配了use_default_speaker。
#!/usr/bin/env python
# coding=utf-8
import os
import azure.cognitiveservices.speech as speechsdk

# This example requires environment variables named "SPEECH_KEY" and "SPEECH_REGION"
speech_config = speechsdk.SpeechConfig(subscription='xxxxxxx', region='xxxxx')
audio_config = speechsdk.audio.AudioOutputConfig(use_default_speaker=True)
# audio_config = speechsdk.audio.AudioOutputConfig(device_name='0')
# The neural multilingual voice can speak different languages based on the input text.
speech_config.speech_synthesis_voice_name='zh-CN-XiaoxiaoMultilingualNeural'

speech_synthesizer = speechsdk.SpeechSynthesizer(speech_config=speech_config, audio_config=audio_config)

def speak_text(text):
    speech_synthesis_result = speech_synthesizer.speak_text_async(text).get()

    if speech_synthesis_result.reason == speechsdk.ResultReason.SynthesizingAudioCompleted:
        print("Speech synthesized for text [{}]".format(text))
    elif speech_synthesis_result.reason == speechsdk.ResultReason.Canceled:
        cancellation_details = speech_synthesis_result.cancellation_details
        print("Speech synthesis canceled: {}".format(cancellation_details.reason))
        if cancellation_details.reason == speechsdk.CancellationReason.Error:
            if cancellation_details.error_details:
                print("Error details: {}".format(cancellation_details.error_details))
                print("Did you set the speech resource key and region values?")
因此,考虑将这个告警声音输出改到esp硬件上实现。
以下是一些可能的改进思路,后续可以抽空验证下。
这里可以考虑ESP8266Audio这个库,通过ESP01s的话,只能用模拟的DAC,即从GPIO3 输出音频信号,喇叭一端接GPIO3,另一端接GND。 声音估计会非常小,可以考虑上功放模块比如PAM8403,或者用三极管2n3904做个能听个响的小功放,也可以上功率管13005这种。
ESP01s用不了外置的DAC,因为它没有GPIO15. 下面这个链接 https://github.com/arduino/esp8266/blob/master/cores/esp8266/core_esp8266_i2s.c#L80 写死了BCK是GPIO15。 如果换成ESP12E,倒是可以上I2S放大器,比如MAX98357。
ESP8266通过wifi在线播放音频会很卡,因为它的ram很小,只有80KB,因此选用ESP12E也有好处,它的Flash有4M,可以把在线音频先下载到SPIFFS,再从SPIFFS播放音频,这样就不会卡。
如果要考虑直接在线播放音频,就得考虑上外置的PSRAM(ESP-PSRAM64H?)。
还有一种方案:ESP32-S3部分芯片内部封装了PSRAM,比如16M flash 8M PSRAM的芯片。8M的”海量”PSRAM应该足以提供足够大的缓存来解决音频卡顿问题,但是缓存设置过大,效果和上面那种暂存在flash上的方案就没有什么差别了,缓存文件越大,意味着等待时间越长,在音频文件本身不大的情况下,效果和直接缓存在flash再播放基本一致。
当然,也可以考虑对TCP传输流程本身做优化,这块需要看芯片和平台支持程度。比如我们可以通过idf.py menuconfig 调整LwIP协议栈上涉及TCP的一些参数:
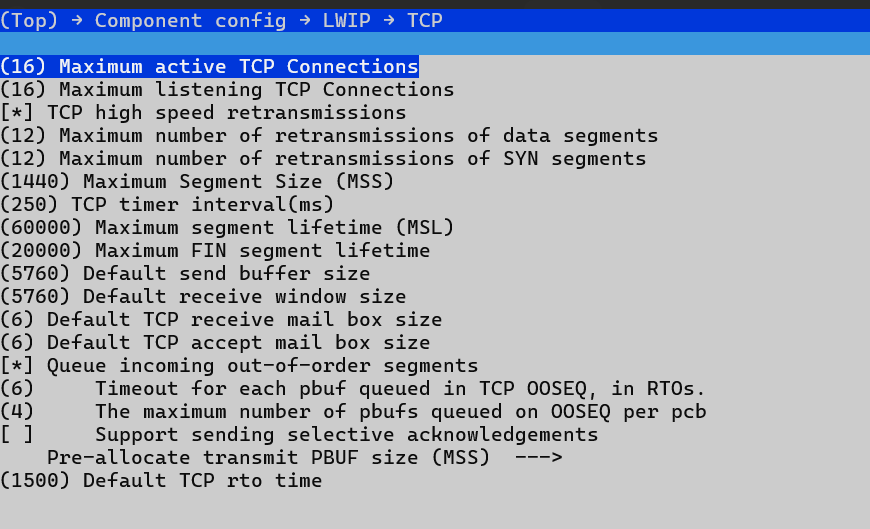
适当增加TCP接收窗口的大小。